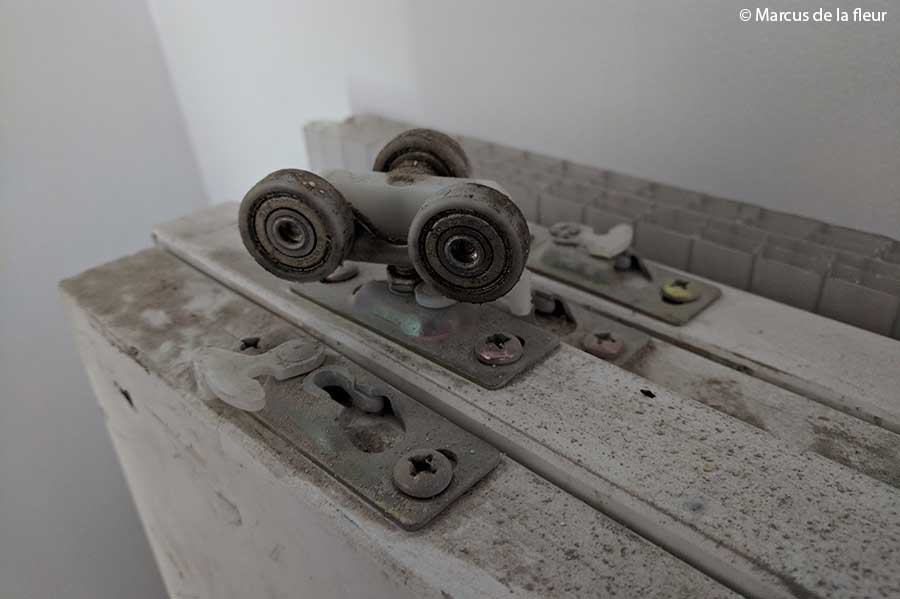
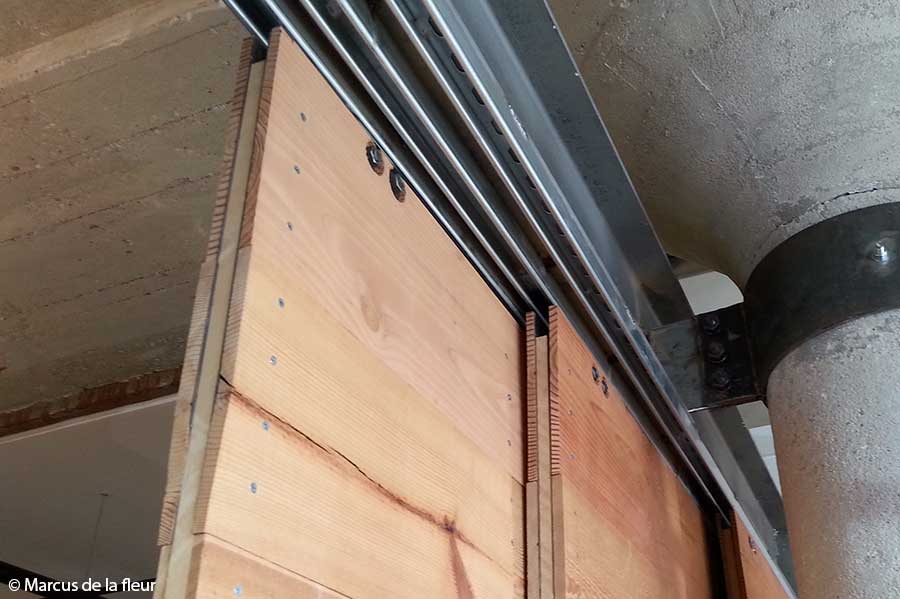
Now, that I had the roller mechanism for our 2nd floor pocket doors figured out, it was time to dust them off, remove what was left from the old rolling mechanism, attach the trolleys to the top of the doors, and hang them into the unistrut rail system.
Done? Not quite yet as there is always some fine tuning. That includes refinishing the doors, and balancing them, so that the closing mechanism can lock them together.
And big thanks to Angelo for helping me out on this task.
I had some rolling mechanism experience based on the 1st floor pocket door work. That process was driven by the old mechanism that came with the salvaged pocket doors we purchased.
We didn’t have that luxury with our 2nd floor pocket doors. First off, they were modern, not antique replacements. Second, they didn’t come with an intact roller mechanism.
While on an architectural tour of a rehabbed office building, I got an inspiration from the mechanism of movable partition walls using regular steel struts with trolley assembly.
This system used very sturdy and off-the-shelf materials. No special orders, fasteners, or fabrication, which made for a straight forward installation.
I was gearing up for the electrical installation on the 2nd floor. What was holding me back were a couple of framing tasks that I had to get out of the way. One of them was the pocket door framing between the parlor and living room.
Before I get to the framing portion, let’s do some time travel: When we bought the building in 2009, there were no pocket doors. Both the 1st and 2nd floor units had been altered to maximize the number of bedrooms, and the pocket doors had fallen victim to that process.
Instead we found a standard hollow core door separating the parlor and living room. The images below show the situation on the 2nd floor.
Not enough of the original pocket door framing was left to build on. So, I had to start over. But at least I was able to position them exactly where they once were, and because I had purchased a pair of salvaged pocket doors a few years back at The Rebuilding Exchange I could tailor the framing to the pocket door dimensions.
Like on the 1st floor, I made sure that I have a sturdy header, and provisions for the roller mechanism, although I used a different roller mechanism than on the 1st floor. More on that in the next post.
There are a couple of tasks on this project always lurking in the shadows, following you around no matter where you go. One of them is stripping generations of paint from precious items.
I am not telling the story of paint stripping the original doors again, instead let’s talk about the delightful hardware that came with the doors. Well, delightful if you have enough creativity to look through the layers of paint.
The hardware got dismantled and stored without much thought – we had bigger fish to fry at the time. But thank God we we had the mind to save and store it. Looking at the pieces now, we began to realize that these were small, unique treasures.
How do you get the paint off of them? I was told its simple. Find yourself an old crock pot, throw in the paint covered hardware, cover it with water and let it simmer for a day. Once everything has cooled down, the paint flakes right off. A few strokes with a wire brush takes off any remaining residue.
This is one of those “too good to be true” moments, but it actually just worked that way. Marvelous!
Did I mention that we saved everything including all the brass screws? That enabled us to put the plates and knobs back up just the same way we took them down.
Now, we not only have beautiful 100+ year old solid wood doors, but we actually can open and close them. One step closer to make the 1st floor feel like a home!
The framing for the original pocket doors on the 1st floor is still in place, but not of much use to us. It is a little wobbly and doesn’t fit the replacement pocket doors we bought.
After a lot of inspecting, re-inspecting, measuring and some hurting brain cells, I decided that it made sense to remove the existing framing structure and start fresh.
The pocket doors with their oak construction are pretty heavy and it made sense to replace the existing 2 by 4 headers with something more substantial. I found two 2 by 10’s for a fair price at the ReBuilding Exchange that were long enough for the span. I am pretty sure that these are over-sized, but it is still better than the other way ‘round.
Then there is the issue of how to get the pocket doors to slide open and shut. We have the intact roller mechanism that came with the doors. But I need to figure out a rail structure for the rolls.
The solution evolved from looking at the construction of other pocket doors and materials available to me on-site.
I mounted a half by three quarter inch oak rail onto a section of 2 by 4. The oak rail was ripped from scrap pieces that were left over from our window trim extensions.
The plan is to screw the 2 by 4 with the oak rail to the bottom of the header. Before doing so, the assembly is ripped to the correct depth and an angle cut away under the oak rail. This should prevent the mechanism from jamming or getting stuck.
I also plan on lubricating the oak rail with paste wax before employing the doors. I hope that will facilitate an easy opening and closing, although I have to fry other fish first, such as adding three inches to the top and bottom of the doors.