Now that I managed to get some daylight into the container, I thought of the best way to store equipment and materials. To maximize the space, I needed to hang things on the inside walls.
That was easier said than done, considering that the walls are steel. And I did not want to put screws or any other kind of fastener or any holes through that steel wall.
The idea that emerged was to frame the inside with a few two by four studs that would provide the support for hooks and other things I may want to attach to the walls. And it turns out that a two by four fits rather nicely into the ribbed indentions of the container walls.
To hold the stud in place, I screwed a small block at the bottom into the wood floor. I used another stud across the ceiling and attached it to the two by fours in the walls with an angle iron. This horizontal piece is basically a blocking at the top that secures the framing firmly into place. Certainly firmly enough to hold my ladders.
I finally had my container shed, but it was super dark inside, even with both doors wide open in the middle of the day. The rust-red paint on the inside seemed to absorb most of the light that gets in.
That had to change. I was not in the mood for rummaging with a flashlight through the back of the container each time I had to get something out. I wanted a lighter and more reflective color on the inside, such as white.
Yet I was not in the mood to paint the inside with a brush or small roller. So I went ahead and invested in a small paint sprayer that I also could use for other projects later.
Using a paint sprayer was a smart move, if I may say so, turning this painting project into a really quick job. And the result delivered exactly what I had hoped for – some more light that would allow me to find things even in the back of the container.
This was one of the big mysteries that occupied me a lot during the research phase. How does a shipping container get delivered? And even more importantly, how does it get set in place?
YouTube enlightened me a little bit on this subject. I learned that you can use a crane, but you don’t have to. You can have the container dropped in place by a flatbed tow truck.
Ron, my container vendor, confirmed that the tow truck drop off method is the most common one. And because the container yard was only a couple of miles from our house, I didn’t have to pay too much for delivery.
But I wondered whether the tow truck method would work in my case.
Getting a 35 foot tow truck from the alley into my yard wouldn’t be easy. It required quite a wide gate or opening in the fence. Plus the truck would have to line up in an east-west orientation to set the container in place, and it needed another 40 feet minimum in front of the container to be able to set the container on the ground and pull back out of the yard after the drop.
We did get concrete trucks that are as long as the tow truck into the yard by removing one fence post next to the gate. That gave us just about a wide enough opening. All other dimensions were super tight with little to no wiggle room.
What I needed was the smallest possible tow truck for my container and a really good driver. I was lucky and I got both.
Our driver didn’t blink about getting the truck into the yard. However, he had his doubts about having enough room to drop the container and then pull back out. As you can see in the video, he managed both. But he used a little trick.
First take a look how he managed to perfectly line up the truck with the concrete slab. He literally dropped the container within half an inch of where I needed it. I was impressed.
For the drop off, he didn’t want to extend his tuck bed all the way because of the limited space to pull back out. Instead, he suggested to stop the bed a few feet short and drop the container on two wood blocks.
That did the trick, and I was able to remove the blocks and lower the container onto the slab with the help of a five foot pinch point bar.
Calling for the concrete truck always makes me nervous. You must have all your ducks in a row before the truck arrives or you’re asking for trouble. And once the concrete pour starts you are under the gun, because you only get a certain amount of time per cubic yard to unload before you’ll be charged extra. And you only get one shot to get it right.
The pour for the container concrete slab went fairly smoothly. We had a good truck driver who knew what to do and wasn’t afraid to jump in and help.
We filled the form work with concrete and did a first rough raking. I had set aside a straight two by four which we subsequently used to screed an even surface. That was the quick part of the job. Troweling the edges and smoothing out the middle with the bull float took a little longer, but mainly because I was clumsy with the bull float.
Because the weather was unseasonably cool, I had organized two insulation blankets to cover the slab and protect it from the overnight freezing temperatures while it was curing.
Once the concrete was cured, I removed the form work and we were ready to get the container delivered.
Just in case you’re wondering about the two gray pipes that are sticking out near the edge of the slab: One pipe is a conduit for low voltage electrical wiring and the other for high voltage, just in case I decide at a later point that I need either one in the container. But that would require a separate permit from the city first.
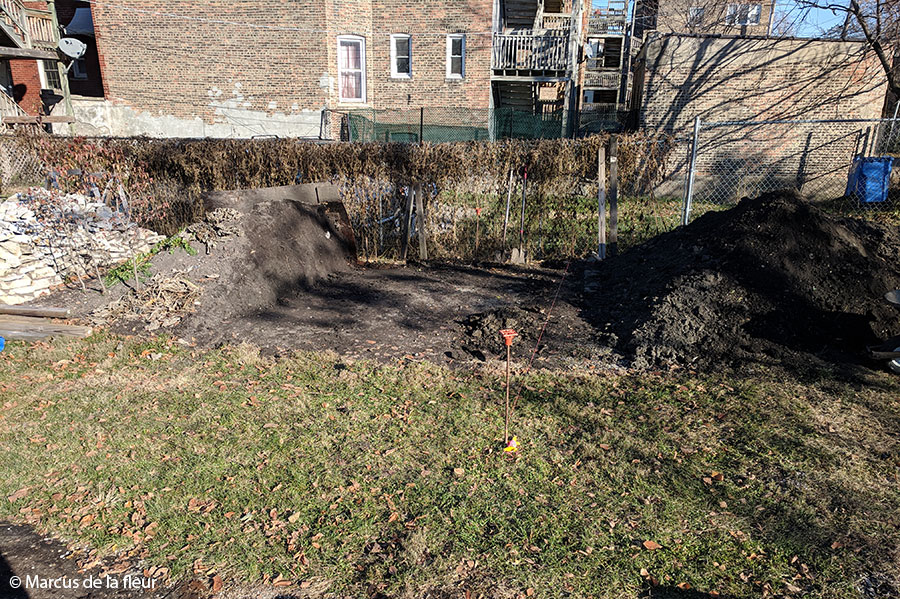
To get the container placed where I wanted, I had to move mountains. Maybe not a mountain, but a hill. OK, it was just a pile of topsoil.
It was the topsoil I salvaged from the parkway rain garden installation. And it was sitting right where I had planned to locate the container.
Once that was moved out of the way, I could start excavating for the concrete slab and aggregate base. I dug down until I was on solid subsoil. That ended up being deeper than the required six inches shown on the plans, because I wanted to get past some buried debris that I came across.
With the excavation complete, I proceeded to compact the subsoil. That was a little bit of a bumpy ride due to the undulating terrain. That problem was solved by leveling out the bottom with dense road base aggregate (IL DOT CA6), followed by the specified granular road base (IL DOT CA7). I kept compacting each four inch layer of base during the installation.
While I was installing the last layer of aggregate base, I also installed the form work for the concrete slab. This helped me with getting everything to the right elevation and level.
The top of the concrete slab was to be a few inches above existing grade to keep the container high and dry. Water should flow around the slab but not onto the slab.